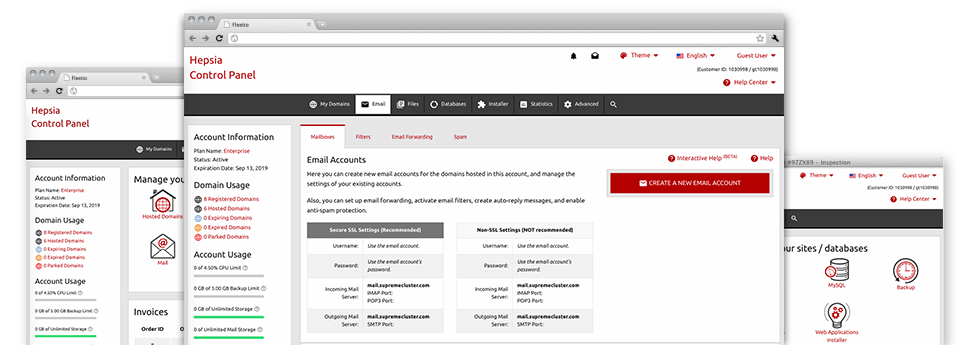
While working with e–mail messages generally is an easy task, managing the email accounts for your site could be a laborious job. Unless you possess an uncomplicated interface, like our E Mail Accounts Manager that will help get the job done. It includes a considerable amount of built–in very helpful tools that will help you perform elaborate things within a few clicks of your computer mouse. Check out precisely what Molax Hosting’s E Mail Accounts Manager will do to suit your needs!
Anti–Spam
Intended to hold spam faraway from you
No one wants spam within his mailbox. By reason of this, we have designed a custom anti–spam solution depending on well designed techniques that filter arriving e–mail messages and hold the junk mail away.
You may choose between different amounts of protection, depending on what type of junk e–mail messages you receive. Additionally, you are able to indicate a distinct degree of spam protection for other mail accounts. Last, but not least, you can select what will happen to e–mails flagged as spam – to be deleted or forwarded to a particular email address.
Email Forwarding
Route messages from a single email address to another one
We have managed to make it easy for you to forward emails from one mailbox to an alternative one within your shared website hosting plans account. Everything you should do is specify the e–mail account which you want to forward and then submit the desired mailbox in which you would like all the messages to get sent to.
Additionally, you can enable a duplicate of each and every forwarded message to be left within the e–mail account that you already have forwarded.
Email Filters
Manage your mailboxes without any difficulty
In case you receive a considerable amount of e–mails each and every day, it’s crucial that you have them sorted. This is why we offer server–side electronic mail filters that come into action even before you look at the mailbox for new emails. Therefore, should you set up your custom–made spam filters, you won’t ever find spam within your mailbox!
Configuring brand new e–mail filters is really simple and easy. You will need to specify exactly what the filter has to look for, the spot that the filter actively seeks it (subject, body, etc.) and what transpires with the filtered e–mails.
Email Protection
Email defense with DomainKeys and SPF records
We have integrated a group of software tools within your Web Hosting Control Panel that will guard your email address from being used for spam purposes without you knowing. We’ve DomainKeys activated for all email accounts automatically. This service compares the sender’s website to the email message to ensure that the sent message originates from that address.
We have at the same time provided you with SPF (Sender Policy Framework) protection – a service, that defends all the e–mail accounts from spammers who use your mailbox to transmit spam messages on presumably your account.
Email Auto–Configure Option
Configure a mailbox on your personal computer in a click of the mouse
When you check your email from your laptop computer or desktop computer, you almost certainly work with an email client. To save you the difficulty of having to personally integrate each next mailbox in your mail client, we’ve included smart ’auto–configure’ files. Just get hold of the file and open it up using your mail app – this will immediately configure your inbox in your chosen desktop client.
We have got auto–configure files for: Mozilla Thunderbird, Mac Mail, Outlook and also Outlook Express.
Webmail
Check your e–mail account from anywhere
Working with webmail, you can look at your email messages trough any computer, all over the world. Everything is done through a web browser, and there’s no need to have any kind of mail client set up within your system. Use the URL which we provide you with to sign in to your email account through various Internet–connected device.
What’s more, you can sign in to your email account with a click of the mouse through the Webmail section of the Web Hosting Control Panel. All you have to do is find an e–mail address and after that click the webmail client icon to gain access to it. You don’t have to enter any kind of e–mail sign in data.

